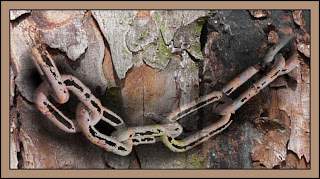
I'm using Paint Shop Pro but you could make the same border in Photoshop. This is how I do it, although there may be other ways to do it!
If you simply want a coloured border go to Image, Add borders. Make sure symmetric is ticked and choose a pixel size - I usually go for 3 or 5 and colour black, ok, if all you want is a thin black border. You can go on to add to this: go to add borders again and this time increase the pixel size (your choice), I usually pick about 35 pixels and the colour white OK. Add borders again and choose 3 or 5 pixels colour black ok. This leaves you with a white border which you can fill with a colour of your choice. Use the dropper tool to pick a colour in your image and then fill the white border using the flood fill tool.
An alternative to filling with a colour is to copy a pattern from your image and use this to fill the white border; I could tell you how I do it if anyone would like to know!!

Yes, thanks Julia. I managed it! Have a look! I think it frames my flower photo lovely and I know how to change the colours now too. I used a black outline, then a wider white border, then another thin black outline. Lovely! Thank you so much!
ReplyDeleteCarolyn x
Must see if I can do this with Elements. I have used flickr picnik to add borders and it often really finishes of the photograph well
ReplyDeleteVery interesting shot you're using for your frame tutorial. I can see that that is actually two photos combined. Nice job on the tutorial also.
ReplyDelete