Saturday 31 July 2010

Paint Shop Pro layers tutorial

I've had a request for a simple layers tutorial, so I'll give it a go and hope it makes sense!
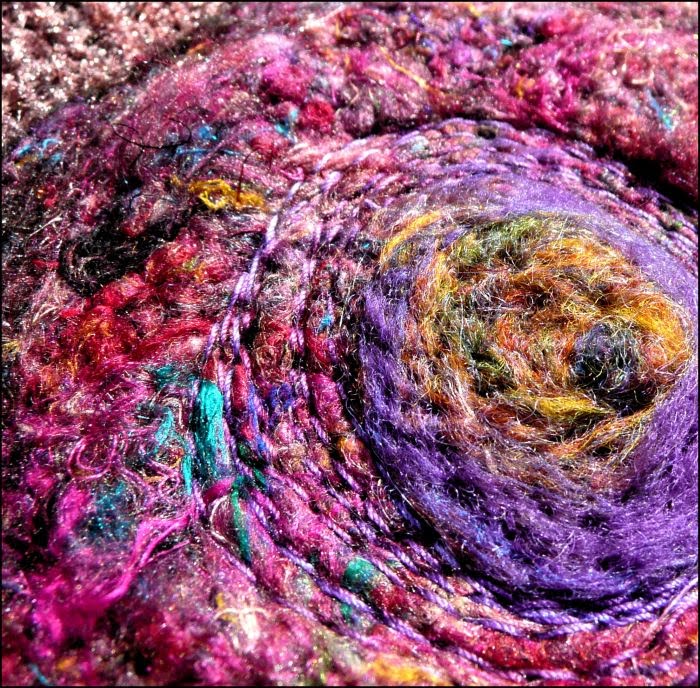
Open two images and decide which one you want for the background layer and which one is to go on top of this. I chose this for the top layer -

and this one for the background layer -


I duplicated the background layer in case I wanted to work on it (left click on image
>duplicate) then I clicked on the top layer in the layers palette and changed the blend mode from normal to luminance (you can play with the different blend modes until you find one you like). I left the luminosity at 100% but you can change this as well.


Go to layers>merge all and save under a new name.
(To bring up the layer palette - view>palettes>tick layers). Enjoy playing!

Wednesday 28 July 2010

Paint shop pro cheat's border No 1

Ok, I give in. One little foray into textiles will suffice for the moment. I found a cheat's way to do a border in psp's frames which I thought I would share with you particularly if you are using psp, although there is something similar and probably even better in Photoshop. (I say "cheat" because this is a reference to a well-known cookery writer in the uk whose latest book uses this phrase!)
For the latest pic I used a photo of a fuschia which I then altered in psp . This is how I added this border -
Image>picture frame. From the drop-down list choose Transparent (I chose the second one). I added an extra black border - image>add borders, 3 pixels, black, ok. Now choose a colour in the image using the dropper tool and fill in the white borders using the flood fill tool. Finished! Save under a new name. I hope this is useful!

Tuesday 27 July 2010

Not a single border in sight!

I finally got round to getting my sewing machine in action again after buying a pdf pattern from
Jackie for an iphone case (No I don't have an iphone! Whatever gave you that idea!). I used a commercial batik fabric with a blue lining; the embellishment was a piece of foiled paper wih a voile spiral on top. There are a few mistakes but I'll regard this one as a practice run - an excuse to make another one! Pop over to Jackie's blog to see her lovely textiles, especially her brooches. (Secretly I did have a play with a new border ....)

Sunday 25 July 2010

Room for one more!


The swirls were originally a photo of a dried sunflower head. Now I'm going to wean myself off borders and digital designs and get back to textiles!

Saturday 24 July 2010

Thanks


Thanks must go to Scott who blogs under the name "Finding Another View" for starting me off on these borders. His photography is really inspiring!

Wednesday 21 July 2010

Coloured borders


I'm using Paint Shop Pro but you could make the same border in Photoshop. This is how I do it, although there may be other ways to do it!
If you simply want a coloured border go to Image, Add borders. Make sure symmetric is ticked and choose a pixel size - I usually go for 3 or 5 and colour black, ok, if all you want is a thin black border. You can go on to add to this: go to add borders again and this time increase the pixel size (your choice), I usually pick about 35 pixels and the colour white OK. Add borders again and choose 3 or 5 pixels colour black ok. This leaves you with a white border which you can fill with a colour of your choice. Use the dropper tool to pick a colour in your image and then fill the white border using the flood fill tool.
An alternative to filling with a colour is to copy a pattern from your image and use this to fill the white border; I could tell you how I do it if anyone would like to know!!

Tuesday 20 July 2010

Pink border


I've added a pink border to this one. If by any chance you would like to know how to do this, let me know !!

Monday 19 July 2010

Sunday 18 July 2010

Border variation


I hope that the instructions in the last blog were easy to follow if you had a go - I should have said that I work with Paint Shop Pro but almost all the effects etc are in Photoshop but sometimes under a different name or different place. I believe that the chisel effect is found near bevel in Photoshop.
This blurred background has had the coloured edges effect applied - luminance minus 107, blur 5, intensity 66. Happy playing!

Saturday 17 July 2010

Border

Thought I might share how I made this border. Didn't have a tutorial, just fiddled about till I found this border which I liked! Here goes -
Open your image and blur with Gaussian blur, radius 4, Save this blurred image and open original image again so that you have them side by side. Layer the original (unblurred image) on top of the blurred image and resize the top layer until you have a border of blurriness showing (You can see how technical this is!). On the top layer I then went to effects, 3d effects, chisel, size 11, transparent. Save as merged image. Let me know if this works!!

Wednesday 14 July 2010

Quilt?


I'm going to call this a digital quilt. It's not made of fabric but has at least three layers using my photos and a border. Paint Shop Pro was a great help!

Tuesday 13 July 2010

Julie's card

As promised, here's the card which Julie gave me on Lindisfarne. It's a beautiful image of a seascape made with her own dyed fabrics with beads and stitching added. A great reminder of the day! Thank you Julie!

Monday 12 July 2010

Lindisfarne and blogger friends


We spent Saturday on Lindisfarne where we had arranged to meet blogger friends Julie and hubby (he of the picked photography brains!) Stewart. In spite of being overcast it was warm and even the rain was warm - not that we noticed as we were in a pub at the time! The five hours we spent being surrounded by the sea passed quickly and an enjoyable time was had by all! Will show you the lovely card from Julie next time.

Friday 9 July 2010

I've started, so I'll finish

I'm far from finishing, as I'm still making squares to add to the ones I 've already made. I decided to add a border of sari yarn to each one as the colours go well with the fabric.
In addition I painted a few squares with acrylics on watercolour paper with the help of some scrim ..


which I then photographed and printed out onto fabric adding some wool tops and stitching.


Got a few more ideas to work out!

Wednesday 7 July 2010

Hope


Words taken from poem "Peter" by Clive Sansom. I like them ..

Saturday 3 July 2010

More squares


I've been making more squares to add to the ones already made. None are finished yet and I have to admit I don't have a grand plan but am making it up as I go along. I like the textures and the colours and that is what I am concentrating on at the moment before adding more embellishments and deciding how to make them all "hang together". I'm enjoying the journey!

Thursday 1 July 2010

All the way from Australia!


Yesterday I received a lovely parcel from Linda in Australia, a prize for being the 100th follower of her blog. The small bag contained fabric samples dyed and stamped, plus a card with a sample of her stitching and fabrics. Thank you Linda for your generosity!


And all this arrived quicker than some post in this country!